Shutter Styles
Full Height
Full Height
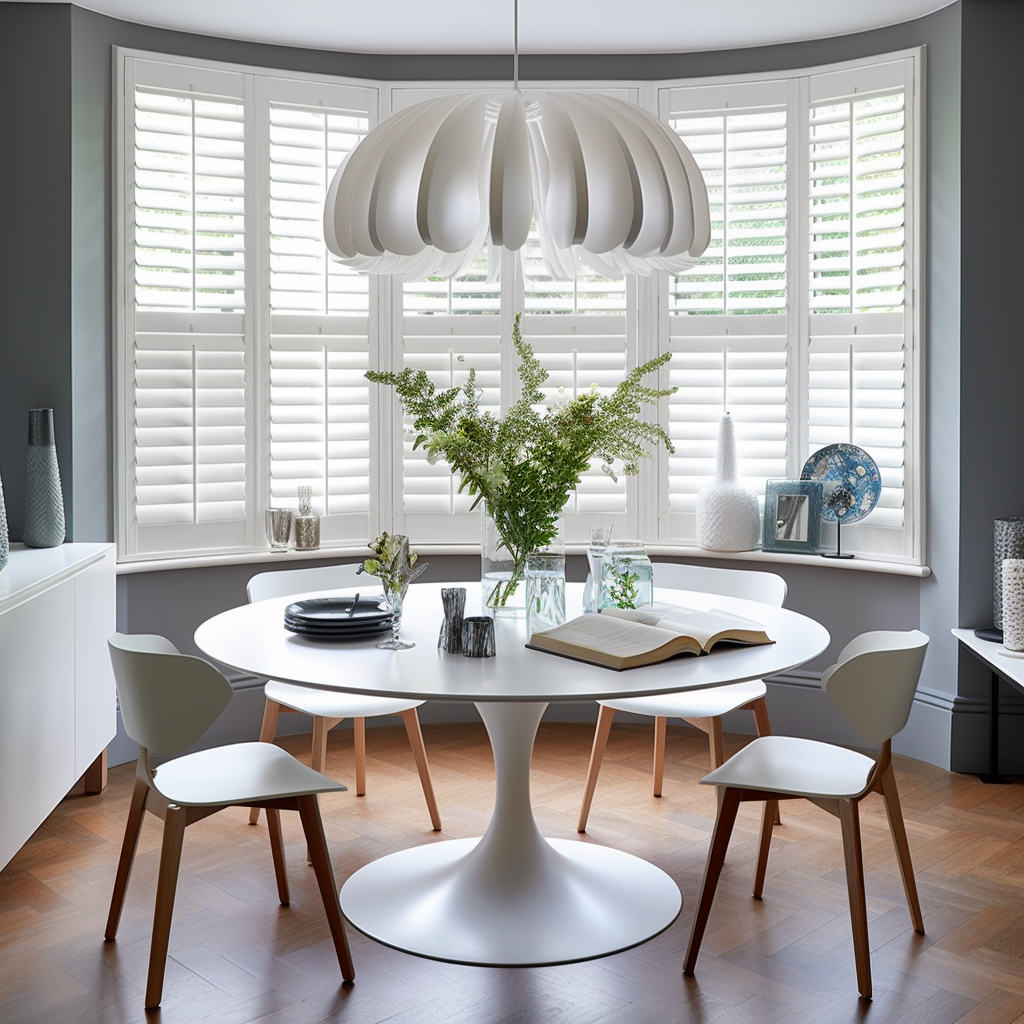
Full height shutters cover the whole of the window from top to bottom. This style gives the cleanest appearance as the flow of louvres is uninterrupted. Ideal for bedrooms where maximum blackout is required, this style will look equally well on any window in the home.
An additional design feature which can be incorporated in your full height shutters is a mid rail or a divider rail as it is also known (above right). This is a horizontal piece of wood, generally located around the mid point, which splits the louvres into two sections, thus allowing the lower section of louvres to be closed independently of the upper section or vice versa. This option is popular with urban dwellers whereby the lower louvres can be closed for privacy while the upper louvres remain open to allow light enter.
The mid rail can be located at whichever height you choose but would usually align with any rail or sash bar in your window.
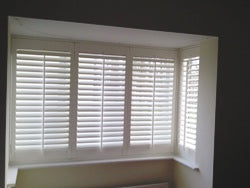
Tier-on-tier
Tier-on-tier
Tier-on-tier style shutters allow the top shutters to be folded back while the lower tier remain in place. This style is very suited to rooms which face northwards and therefore tend to be quite dark. The lower shutter panels can remain closed over for privacy while the top panels can be opened back to allow maximum light enter the room. While they might be slightly harder to install, the functionality of this style is well worth the extra effort. As with the mid rail in the full height style, the split point (where top tier meets bottom tier) should align with any rail or divider in your window.
Tier-on-tier style shutters are more suited to narrower windows where panels tend to be smaller. Because the top panels are regularly folded back, we recommend opting for smaller bi-folding panels which will not protrude out too far into the room.
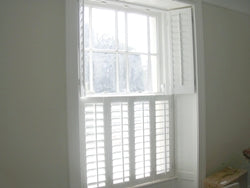
Cafe Style
Cafe Style
Cafe style shutters cover the lower half of the window only. This style is ideal for providing privacy while allowing lots of light enter the room and are particularly popular with customers in towns and cities. Because their function is mainly one of privacy, the shutter panels tend to remain closed and the louvres tilted to alter the light or view.
Panel Quantity
How Many Panels?
How Many Panels?
When it comes to deciding on the number of shutter panels, the golden rule is you should follow the design style of your window. If your window is divided into two sections by a vertical glazing bar in the middle, it's best to choose either 2 or 4 panels as the vertical solid pieces of your shutter panel (the stiles) will align with your window glazing bars. So should you opt for 2 or 4 panels? Well firstly you should ask yourself how often you will fold the panels back off your window. If you are more inclined to leave them in place and just tilt the louvres, you may be better with two panels. This not only gives a cleaner,simpler appearance, it will also allow more light enter the room. If on the other hand you think you may fold them back onto the adjacent wall quite often, you could go with four panels so that they bi-fold back onto each other against the adjacent wall space. The amount of wall space you have beside your window may also dictate how many panels you choose.
Folding Configuration
Folding Configuration
Each shutter panel is hinged to either a surrounding frame or to an adjacent panel. The normal folding configuration is for an equal number of panels to fold in opposite directions. For example if you opt for two shutter panels, one would fold left and one to the right; with four panels, two would fold left, two right and so on. If you would like your shutters to fold back 180 degrees onto an adjacent wall, the amount of wall space availabe may dictate the folding configuration. For example a 600mm window in your bedroom has a wardrobe just 100mm from the reveal on the left but lots of wall space on the right. You can choose one 600mm shutter which folds right and occupies approx. 600mm of wall space or alternatively you could bi-fold two 300mm shutters to the right and these will take up approx. 300mm of wall space when folded back-to-back.
If you choose three panels in a window, two will bi-fold one way and just one the opposite way.
T Posts
T Posts
A T post is a vertical post which is inserted into the shutter frame. It is generally used in larger openings where several windows are divided by glazing bars. T posts enable you to design your shutters to match the existing window design. T posts provide added strength to wide shutter frames. For example if you window is 3000mm wide and is divided into 6 sections, it is too wide to hinge 3 panels together on each side. By inserting a T post 500mm from the left and right, we can now hinge shutters 1 & 6 to their adjacent frame while the centre 4 panels will hinge from T posts . This reduces the number of panels hinged together and the resulting strain on the hinges but maintains the style of the shutters with the window. The configuration for this example in our shutter designer would read LTLLRRTR. In our shutter designer, you will be given the option of adding a T post if your window width is 2200mm or more. T post locations are recorded by measuring from the left. In our example above, the first T post (T1) location is 500mm while the measurement for the second T post (T2) is 2500mm assuming our window is divided into equal sections.
If you need any help when it comes to T posts, please be sure to contact us with your query.
Frame Type
Which Type Of Frame?
Which Type Of Frame?
A shutter frame is used for hinging the shutter panels to and generally surrounds the panels on three or four sides. The type of recess you have around your window will determine which frame is going to work best for you. If your window has a standard recess of 100 to 150mm then you can fit your shutters using any of the L or Z frames.
To decide which is the best option, ask yourself how often you are likely to open the panels back. Shutters mounted next the window using the L frame with open at a 90° angle to the window and protrude into the room whereas shutters mounted at the front of the reveal using the Z frame or outside mount frame will fold back 180 degrees flush against the wall. For bay windows choose the inside mount L fame. If you have a deep reveal, the inside mount with L frame may work best, for example a four feet wide window, with four x 1 foot panels,and one foot deep reveals would allow two shutter panels to bi-fold back neatly to left and two to the right, into the one foot of reveal space. For bay windows choose the inside mount L frame.
Choosing one of the three Z frame will help to hide any imperfections in your plastering around the recess corners. Also if as is the case with most openings, the width is slightly different at the top than at the bottom, the Z frame will disguise this and in effect square your window for you.
Beaded L or Insert L Frames
Beaded L or Insert L Frames
Use the Beaded L or any of the three Insert L Frames if you want your shutters set back within the reveal next the window frame. Panels will open at a 90 degree angle to the window, back against the reveal. Use the medium or large insert frames to avoid any protruding objects like handles. Insert L frames can be face-fixed with the removable strip concealing the screw heads.
Z Frames
Z Frames
Use any of our threeZ Framesfor mounting your shutters to the front of the reveal, wrapping around the corner to give an architrave-type finish. Panels will fold back 180 degrees against the face of the wall. Great for concealing out-of-square windows where widths or heights differ.
Choose any one of the Z frames if you want to mount the shutters at the front of the reveal. The Z frame gives an architrave-type finish to the window.
Camber Deco Frame
Camber Deco Frame
If your windows are almost flush with the face of the wall, then you have little or no recess on which to attach a frame so you would mount the shutters outside the reveal using the Camber Deco Frame. This frame is also used where windows tilt or open inwards.
How Many Sides?
How Many Sides?
We always recommend a four-sided frame where possible. Easier to install and also allowing magnets to be fitted to the bottom of the panels for better closure.
If you choose one of the Z frames but have a protruding sill, you need to choose a three-sided frame will sill plate. This means the overlap part of the Z frame is trimmed off on the bottom frame, effectively changing it to an L frame, which will allow it to sit flush on your window sill.
L frames mounted within the recess are generally four sided.
If you have a deep reveal complete with window board, very often the window board can slope upwards towards the front of the reveal and catch the underside of panels that are opened out. By using a four sided frame, ie the frame continues across the bottom, the panels are raised up 22mm and so avoid any uneven sills. This is particularly the case with many bay windows.

Shutter Colours
We recommend you choose a colour in keeping with your interior design scheme. For example if your window frames and skirting and architraves are a soft white, you should try and match your shutters as closely as possible to this. Choosing a cream finish against white woodwork might make your shutters appear faded and in need of re-painting.
Don't get too hung up however with finding a perfect match. When sunlight reflects off the shutters it's difficult to notice any difference between shades on two different surfaces. Almost 95% of our customers choose a white or an off-white finish for their shutters over a dark stained finish. A bright surface will reflect more light into your room as well as giving a bright and uplifting appearance.
Use a dark rich stain for more formal areas of your home. A dark walnut can look fantastic in a study for example and our premium grade basswood reveals a beautiful grain when stained.

Louvre Size
There are three different louvre sizes for you to choose from. Each one can look great in it’s own setting and there are no hard and fast rules as to which one you should choose. Very often the size of the panel you’ve chosen will dictate the size of louvre you decide on. Going back to our previous example of the four feet by three feet window, if you decided on just two panels, either the 64mm or the 89mm louvre would suit best whereas if you decided on four panels maybe the 46mm or the 64mm would suit better. At the end of the day it’s down to your personal choice. The majority of our customers choose the 64mm louvre as it looks good in almost any environment.
The largest 115mm louvre can be a little dominant if used in the wrong settings and is best kept for large openings like floor to ceiling windows and large apex feature windows.
The larger the louvre the more light is allowed in and the greater view is afforded out. Also, keep the same size louvre in the same room and on the same aspect of the house.

Tilt Rods
A tilt rod is the central bar at the front of the shutters panel which is used to open and close the louvers. The traditional look has the tilt rod in the middle however many of our customers opt for an off set tilt rod which means the tilt rod is fitted 25mm from the edge of the louvre. You can however choose to design your shutters without a tilt rod by opting for a hidden tilt rod, also known as easy tilt. A discrete metal rod is connected to the louvres to the rear of the panel. Moving one louvre with your hand means all the louvres open and close together.
The hidden tilt rod tends to work best where windows and shutter panels are small and you don't want things to look too cluttered, while they also allow for an unobstructed view. However the off set tilt rod option is often a good compromise and keeps the "look" of plantation shutters.
If your shutter panel is over 1200mm tall, we recommend a split hidden tilt rod which has the advantage of allowing you to close the lower louvres for privacy while the upper louvres remain open.

Hardware
Your shutters come with recessed button magnets fitted and all hinges in place. While the magnets are a standard chrome finish, you do have a choice of hinge colours to choose from.
- White
- Off White
- Brass
- Chrome
Choosing a hinge colour that matches your chosen finish will hide the appearance of the hinge and make them less visible whereas choosing a brass or chrome will make a feature of the hardware. The majority of our customers choose a matching coloured hinge.